If you are into photography like I am then you probably will have seen countless online adverts and other photography websites talking about Skylum’s Luminar 4 software. It seems to be a very polarising bit of software, not because of it’s abilities as a photo editing program, but because some photographers believe it has no place in a ‘real’ photographers workflow.
Well Mr Claus visited me recently and gave me a little bit of spending money so I decided to buy myself a copy to see what all the fuss was about. But this post isn’t meant to be a fully comprehensive review, just a general overview of the programs much lauded ‘Sky Replacement’ tool as that is A) the primarily the reason I bought the software in the first place; and B) the tool that I have used the most so far. I might write a full software review once I have used all of the features a bit more though.
So let me just say straight off that if you are expecting Photoshop levels of control and functionality from this app then you are going to be very disappointed, Luminar 4 looks to be designed primarily with simplicity in mind, for users who are more used to editing photos on their mobile phones and then posting to Instagram. That said however for those users that like a little more control over their edits there are the usual sliders to control Exposure, White Balance, Contrast, etc and when used in this manner it is more akin to Adobe Lightroom than Photoshop.
But for now forget all of that, this post is purely all about the Sky Replacement feature. In a word it is nothing short of breathtaking. Within a few clicks Luminar’s AI is capable of realistically replacing the sky from one photo with another and to help make the replacement even more convincing, it recolours the parts of the image it didn’t replace.
Take a look at what I mean with my test image below. This image of Rosslyn Chapel was taken when I first got into photography and looking back at it with older, more experienced eyes I am able to critically say “It could have been better”. Firstly, I took the photo at the wrong time of day, the light was still too strong and harsh. Secondly, like so many other fledgling photographers I thought in order to make a good photograph you only had to oversaturate the scene. Wrong. But that said I still have a fondness for this scene and like the composition of it. So I thought that this image would make a good candidate to be ‘Luminarised’.
(Drag the arrows left or right to compare the shots)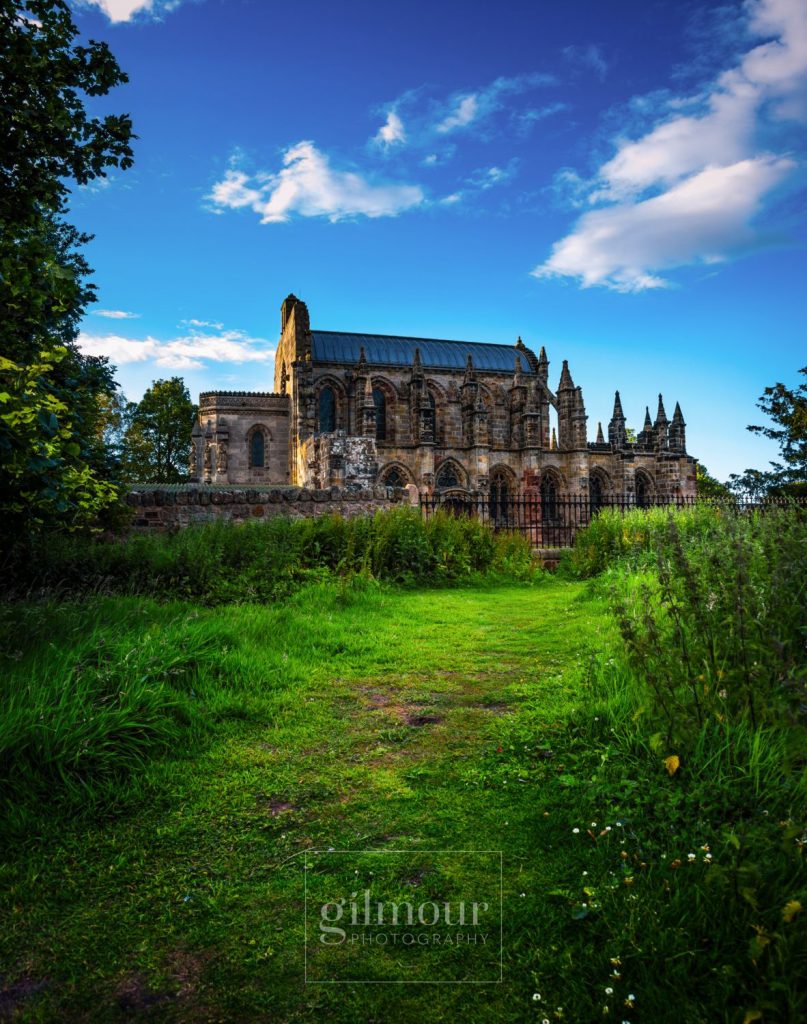
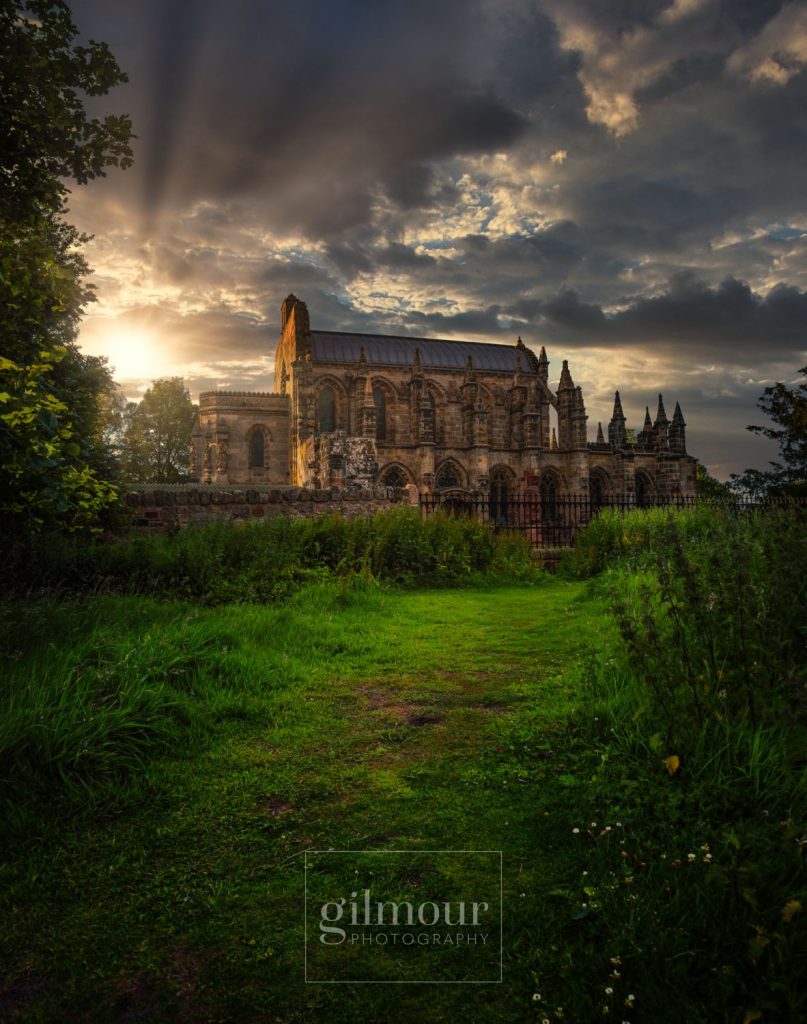
Luminar 4 not only replaced the sky flawlessly, it recoloured the foreground to better match the colouring of the new sky which has resulted in a more authentic and realistic image… it now looks like it was taken much later in the day during ‘the golden hour’. To me the resulting image is far superior to the original, it is one that I would be happy to feature in a portfolio and it took less than 5 mins to do (and 4 mins of that was just deciding which sky file I was going to use).
I have been a Photoshop user since about 1998, so I am pretty good at using it, and I can tell you that you would probably need to spend HOURS of painstakingly detailed work to get results that even came close to Luminar’s… and even then the Photoshop version would be nowhere near as polished as Luminar 4s. Honestly, it’s THAT good!!!
So what of the opinions of those photographers that think there is no place for Luminar 4 in a photography workflow? Well personally I think they are wrong. Traditional photographers using film cameras said the exact same thing about Adobe Photoshop when it was first released, and there are some photographers to this very day that still hold the same opinion “a real photographer should be able to capture a scene ‘as is’ and shouldn’t use any sort of digital manipulation ever”. In an ideal world I would actually agree with that, but this isn’t an ideal world and things can crop up to easily ruin what should have been a great photograph. So why not take full advantage of a tool that will help make an image better?
Take the following photo for example, I shot this at the Scottish International Airshow on a typically grey, wet Scottish summers day and there was absolutely no detail that I could recover from the clouds.
(Drag the arrows left or right to compare the shots)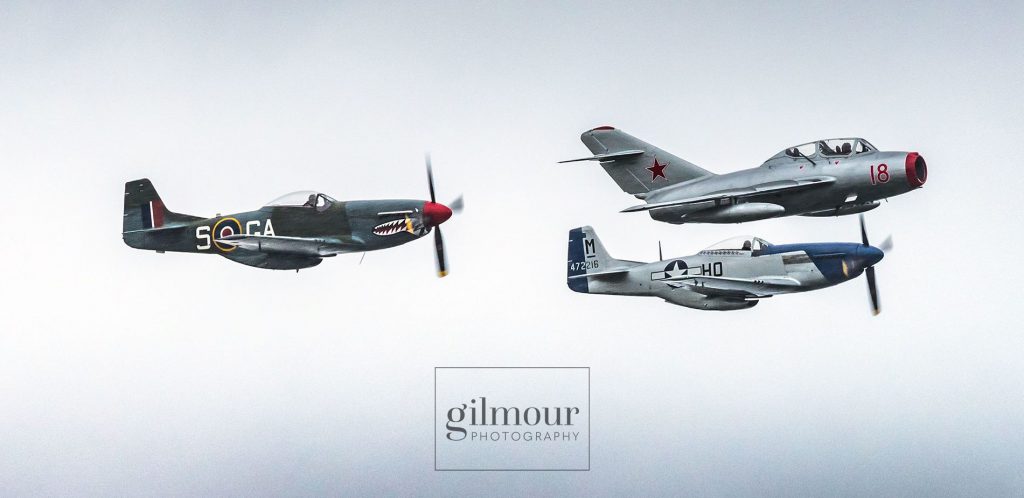
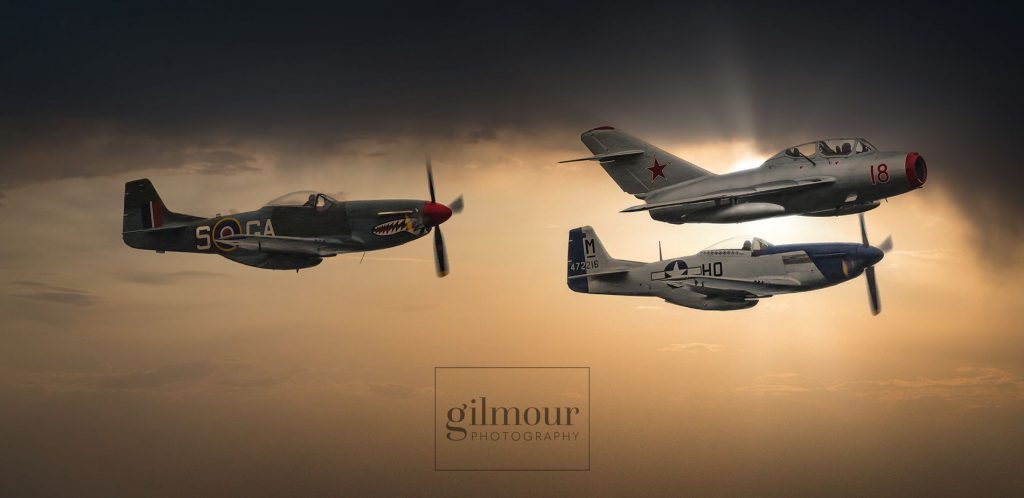
The shot has been completely transformed from an ‘alright’ image into something alot more eye-catching and marketable. Yes it is not a true representation of as it was shot, but Luminar has saved this shot from ending up in the bin and it’s for that reason I believe that Luminar can have a place in a photographers workflow.
I understand why some photographers might criticise the program, there is a risk that in the future our social media feeds may be swamped with thousands upon thousands of photos which all use the same fifteen-or-so sky files and I do agree with that concern… but when used correctly the real power and beauty of Luminar 4 happens when used with your own library of sky photos or better yet, used to merge bracketed photos of the same scene together.
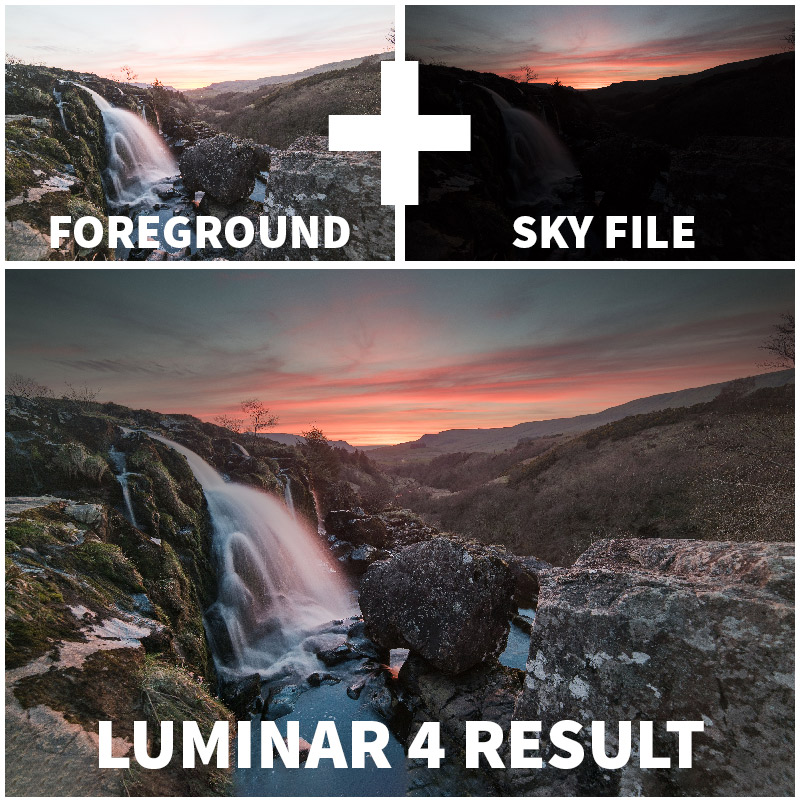
It’s not without its problems either though, I have had a few issues with the application freezing up and repeatedly crashing but the software is brand new and with most software nowadays, some bugs and performance issues are to be expected. These will no doubt be resolved in time.
DISCLAIMER: This blog post was in no way shape or form an advertisement for Luminar 4, this is just my opinion after buying and trying the software. This post is not intended to be anything other than that of my own personal opinion and experiences.